OneCloud: Webphone Call Center User Guide
Home Screen Buttons
CALL CENTER | Click on the Headset icon to see Call Center options. This is the default start tab for your OneCloud WebPhone.
CONTACTS | Click the Contact Card to view your Contacts.
VOICEMAIL | Click the Cassette Tape to view existing voicemail.
CALL HISTORY | Click the Handset & Clock Icon to view your Inbound, Outbound, & Missed Call History. By clicking on an entry, you can place a call to the entry, message them if they are a OneCloud user, send an SMS Message if SMS is enabled for your user and view their contact information.
CHAT & SMS | Click the Chat Bubble to view your ongoing Chat & SMS sessions or to create new ones.
Call Center
Under this tab you can see all the call queues you are assigned to. You can also select to sign in or sign out of individual queues.
To sign out/on from individual call queues: hover over the right side of a call queue and you will see the option to log in/out.
To sign out of all queues at once or to set an “Away” status. Select the Online button on the upper right-hand corner.
 Note: You will be automatically signed into all your assigned call queues when you log in.
 My Stats tab will show you how many calls have been offered.
Contacts
MENU | Click the ellipses icon to open your User Settings and change your active Answering Rule, active Voicemail Greeting, the device used for outbound calls, as well as your Ringtone! See the Settings section for additional information.
SEARCH | Click the magnifying lense to perform a search of your Contacts for a specific contact.
SORT | Click the Sort icon to change the order contacts are displayed in your Contacts
CREATE NEW CONTACT | Click the Plus icon to Create a new contact for your Contacts.
CONTACT LIST | Clicking the dropdown menu will allow you to change which Contact List you are currently viewing.

Voicemail
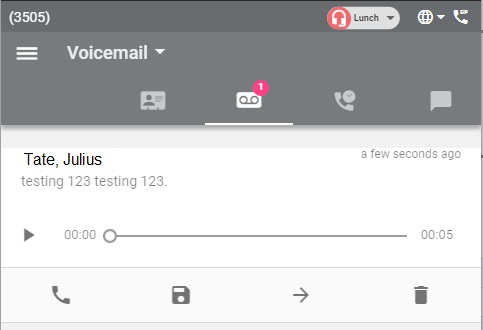
Note: New voicemail notifications will display on the cassette icon. Email notifications for new voicemail can also be setup from the OneCloud platform.
Clicking the dropdown menu will allow you to switch between "New" and "Saved" voicemails.
Call History
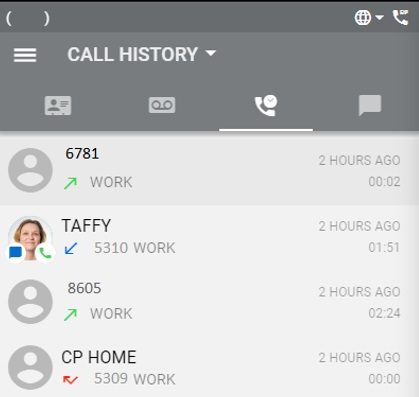
INBOUND CALL | The Blue Arrow signifies an incoming call
OUTBOUND CALL | The Green Arrow signifies an outgoing call
MISSED CALL | The Red Arrow signifies a missed call
By clicking on an entry, you can place a call to the entry, message them if they are a OneCloud user, send an SMS Message if SMS is enabled for your user, and view their contact information.
AVAILABLE | a Green Handset signifies that the user is available to receive a call.
BUSY | a Red Handset signifies that the user is not available to receive a call.
Clicking the dropdown menu will allow you to sort between All, Missed, Inbound, and Outbound calls.
Chat and SMS
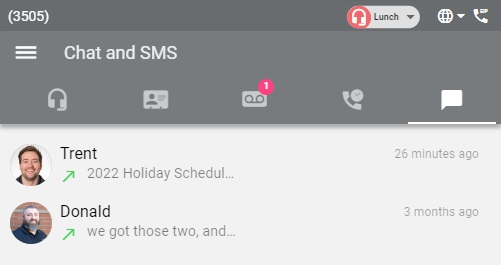
The “Chat and SMS” tab will display your “Chat and SMS” history. When a specific Chat/SMS is selected, the conversation history will then be presented along with the destination Mobile Number or the receiving users' extension. Within this page you will be able to send attachments as well as use a variety of Emoticons!
Making Calls
Dialing
NEW CALL | Click the Plus sign in the bottom right of your window, select the Dial pad button to place an outbound call from the Web Phone.
Incoming Call
When receiving an incoming call, you will see a OneCloud pop up window. You will have the option to Answer, Ignore, or Decline the call.
You will have the following In-Call options once a call has been answered.
MUTE | Prevents the other party from hearing you.
HOLD | Place the other party on “Hold” and plays hold music.
DIAL PAD | Use the “Dial Pad” for entering options in auto attendant or other similar applications.
ADD CALL | Call another party to discuss or combine for a conference call.
TRANSFER | Transfer the active call to another destination.
PARK CALL | Will allow the option to park the call on designated/pre-programmed parking extensions.
SWITCH PHONE | Switch from the WebPhone to your deskphone or any other application that is registered within OneCloud.
CONTACTS | Open your Contact List.
MORE | Clicking this button will allow two options, “Start recording” and “Hide call”.

Start Recording - When enabled, the conversation will be recorded and available in your account's Call History tab of the myonecloud.com website.
Hide Call - When enabled, the call will minimize itself within the WebPhone until told to “Return to call” via the green bar that appears at the top of the WebPhone.
Transferring Calls
To transfer a call, select the Transfer button. The following two options will populate:
Transfer - Choose from contacts:
A window with all your contacts will populate:
1. Scroll to locate the user, you can also search by name.
2. Once you have a user, click the name and select the phone option.
Transfer - Dialing a new number:
1. This option will open the dial pad and give you the option to key in a phone number or extension.
To cancel these options, you can select Return to Call at the top of the application.
Settings Menu
The Settings menu will allow you to see Parked calls, and change your active Answering Rule, active Voicemail Greeting, the device used for outbound calls, as well as your Ringtone!
Call Park
Call Park displays available parking extensions. It will also allow you to pick up a parked call.
Answering Rules
Answering Rules allows you to choose/switch between the rules.
Greetings
The Greetings menu allows you to see your pre-recorded greetings. It also allows you to choose/switch between the different greetings.
User Settings
The User Settings menu allows you to modify/change various features of the Webphone.
The top bar of the Webphone displays the Extension number, a Call Center icon, a Globe icon, and a SIP Handset icon.
The Extension number displayed is the number assigned to the logged agent. (This feature is only available when Call Center is enabled).
The Call Center icon allows the agent to log in/out of the Call Center, as well as choose an Away Status. (This feature is only available when Call Center is enabled).
The Globe icon allows the user to switch the Webphone Language.
The SIP handset icon displays the agent's log on status.
Logout
Selecting Logout will log you off of the Webphone.
Related Articles
Custom Call Center Agent Status
Call Center Supervisors can add custom agent statuses. Pre-defined statuses are broad descriptions such as "lunch", "break", and "available". By using a custom status, the Supervisor has increased granularity on call center reports. Note that custom ...OneCloud: Analytics Wallboard Guide
Welcome to the call center analytics user guide. This article has been designed to help familiarize you with the basic layout, as well as guide you through creating an analytics board and some advanced features. Accessing the Analytics Board Note: To ...OneCloud Basic Portal User Guide
Accessing the Portal You will first need to complete setting up your account using the Welcome Email sent to you by either the onsite installer or TelWare support team. Once set up, you can access your account by navigating to Myonecloud.com. Home ...OneCloud: Contact Center for the Webphone
OneCloud has had extensive call center capabilities available through the portal for users who manage or participate in call queues. These statistics and features are now available on the WebPhone. The functionality is on by default, and available ...Basic Portal User Guide
Accessing the Portal You will first need to complete setting up your account using the Welcome Email sent to you by either the onsite installer or TelWare support team. Once set up, you can access your account by navigating to Myonecloud.com. Home ...